பல்சுவை தகவல்கள் - Thagavalgal in Tamil பல்சுவை தகவல்கள் - Thagavalgal in Tamil

பல்சுவை தகவல்கள் - Thagavalgal in Tamil- Interesting Information in Tamil Useful Information you should know - Computer Tips, Health Tips, online offers, and more helpful Tips and Tricks நீங்கள் தெரிந்து கொள்ள வேண்டிய பயனுள்ள தகவல்கள்

சனி, 23 ஆகஸ்ட், 2014

விரைவில் வருகிறது விண்டோஸ் - 9 !!


மைக்ரோசாப்ட் நிறுவனத்தில் புதிய ஆப்பரேட்டிங் சிஸ்டமான விண்டோஸ் - 9 வருகிற செப்டம்பர் 30 ஆம் தேதி வெளியிடப்படலாம் என்று செய்திகள் வருகிறது .
 
மைக்ரோசாப்ட் நிறுவனத்தின் நெருங்கிய வட்டாரத்தில் இருந்து வந்த செய்திகளின் படி அந்த நிறுவனம் பெரிய செய்தியாளர்கள் சந்திப்பு ஒன்றை செப்டம்பர் கடைசி வாரத்தில் நடத்த இருப்பதாகவும் , அந்த சந்திப்பில் விண்டோஸ் - 9 ஓ.எஸ் வெளியிடுவார்கள் என்று எதிர்பார்க்கப்படுகிறது .

விண்டோஸ் - 9 ஓ.எஸ் தொகுப்பில் மொபைலில் மட்டுமே இருந்து வந்த மொபைல் அசிஸ்டண்ட் ஆன கோர்டனா , இந்த புதிய ஓ.எஸ் இல் இடன் பெற இருக்கிறது . மைக்ரோசாப்ட் நிறுவனம் டெஸ்க்டாப் பயனாளர்களுக்கு அதிக முக்கியத்துவம் கொடுக்கும் என்று எதிர்பார்க்கப்படுகிறது .

கணிணி Crashஆவதற்கான காரணங்கள்


503c1959afa96f6e5400066f

கம்ப்யூட்டர் கிராஷ் -ஆகி நீல வண்ணத்தில் திரை மாறிவிடும், அல்லது அப்படியே திரைக்காட்சி முடங்கிப் போய்விடும்.கம்ப்யூட்டரில் பல பாகங்கள் ஒன்றிணைந்து இயங்குகின்றன. சில வேளைகளில் இவற்றுக்குள் பிரச்சனை வந்தால் இயங்குவது நின்று போகும். ஒவ்வெரு சாதனமும் ஒரு வழியை மேற்கொண்டு அதன் மூலம் தன் இயக்கத்தை மேற்கொள்ளும். இதில் ஒரே வழியை இரு சாதனங்கள் (பிரிண்டர், கீ போர்டு / மவுஸ்) எடுத்துக் கொள்ளும்போது இயக்கம் நின்றுபோகும்.

இவ்வாறு ஏற்படுகையில் start -> settings -> control panel -> system -> Device manager எனச் சென்று பார்த்தால், பிரச்சனை ஏற்பட்ட சாதனத்தின் பெயர் முன்னால் ஒரு மஞ்சள் நிற ஆச்சரியக்குறி தோன்றும். டிவைஸ் மேனேஜரில், கம்ப்யூட்டர் என்பதில் கிளிக் செய்து பார்த்தால், இந்த சேனல் வழிகளுக்கான ஐ-ஆர்-க்யூ என காட்டப்படும். ஒரே எண் இருமுறை இருப்பின் பிரச்சனை அங்குதான் உள்ளது என்று பொருள். இதற்குத் தீர்வு என்ன? பிரச்சனைக்குரிய சாதனத்தை அன்இன்ஸ்டால் செய்து மீண்டும் இன்ஸ்டால் செய்தால் போதும்.
ராம் மெமரியை உயர்த்துவதற்காகப் புதிய ராம் சிப் ஒன்றை இணைத்திருப்பொம். ஆனால், ஒன்றுக்கொன்று வேறுபாடான வேகம் உள்ளவையாக அவை இருக்கலாம். அவற்றிற்கிடையே இணைந்து செல்லும் நிலை ஏற்படாதபோது Fatel expection error ஏற்படலாம். இதனை கம்ப்யூட்டர் பாகங்களின் இயக்கம் தெரிந்தவர்கள் மூலம், பயாஸ் செட்டிங்ஸ் திறந்து, ராம் Waitstate நிலையைச் சற்று உயர்த்தலாம், அல்லது ஒரே மாதிரியான வேகத்தில் இயங்கும் சிப்களை அமைக்கலாம்.
ஹார்ட் டிஸ்க்கின் ஒழுங்கு நிலை கலையத் தொடங்கும். தேவையற்ற தற்காலிக பைல்கள் தேங்கும். பைல்கள் சிதறியபடி சேமிக்கப்படும். இதனால் இயக்க வேகத்திற்கு ஹார்ட் டிஸ்க் இணையாக இயங்க முடியாமல் போகும். அப்போது கிராஷ் ஆக வாய்ப்புண்டு. எனவே அடிக்கடி ஹார்ட் டிஸ்க்கினைச் சுத்தப்படுத்த வேண்டும். சி டிரைவில் தங்கும் தேவையற்ற பைல்களை அதற்கான புரோகிராம்களை கொண்டு நீக்கலாம்.

வீடியோ கார்ட்: சில வேளைகளில் கிராஷ் ஆகும்போது Fatel OE expection and VXD errors என்ற செய்தி கிடைக்கும். இது வீடியோ கார்டினால் ஏற்படுவது. இதனை தவிர்க்க வீடியோ டிஸ்பிளேமின் ரெசல்யூகளைக் குறைக்கவும், start>>settings>>control panel>>Display settings எனச் சென்று ஸ்கிரீன் ஏரியா பாரினை இடது மூலையில் நிறுத்தவும், அதே போல் கலர் செட்டிங்ஸ் சென்று 16 பிட் என்ற அளவில் அமைக்கவும்.

வைரஸ்: பெரும்பாலான கம்ப்யூட்டர் கிராஷ்களுக்கு வைரஸ்களே காரணம். சரியான ஆண்ட்டி வைரஸ் புரோகிராம் ஒன்றை நிறுவி, அப்போது அதனை அப்டேட் செய்வது மட்டுமே இதனை தடுக்கும். பல வைரஸ்கள் பூட் செக்டாரைக் கொடுத்து வைக்கும். இதனால் கம்ப்யூட்டரை இயக்கவே முடியாது. எனவே, இது போன்ற நிலையில் கை கொடுக்க விண்டோஸ் ஸ்டார்ட் அப் டிஸ்க் ஒன்றை உருவாக்கி கைவசம் வைத்துக்கொள்ளுங்கள்.

பிரிண்டர்: பல வேளைகளில் கம்ப்யூட்டர்கள் பிரிண்ட் எடுக்கையில் கிராஷ் ஆவதை நீங்கள் கவனித்திருக்கலாம். இதற்கு காரணம் பிரிண்டர்களில் மிகவும் குறைந்த அளவில் பபர் மெமரி இருப்பதே காரணம். மேலும், கம்ப்யூட்டரிக் சிபியு சக்தியை பிரிண்டர்கள் சற்று அதிகமாகவே பயன்படுத்தும்.
எனவே பல வேளைகளுடன் பிரிண்டிங் வேலையை மேற்கொள்கையில், அல்லது அதிகமான அளவில் பிரிண்டருக்கு டேட்டாவினை அனுப்புகையில் கிராஷ் ஏற்படும். நாம் சாதாரணமாக காணாத கேரக்டர்களை பிரிண்டர் அச்சிட்டால் இந்த பிரச்சனை தலை தூக்குகிறது என்று பொருள். உடனே பிரிண்டருக்கு செல்லும் மின்சாரத்தை 10 விநாடிகளுக்கு நிறுத்தி பின் மீண்டும் இயக்கவும்.

சாஃப்ட்வேர்: முழுமையாக இல்லாமல் அல்லது மோசமாக இன்ஸ்டால் செய்யப்பட்ட சாஃப்ட்வேர் தொகுப்புகளால், கம்ப்யூட்டர் கிராஷ் ஆகலாம். இவற்றை சரியாக அன்இன்ஸ்டால் செய்திட வேண்டும். இல்லையேல் இவை தொடர்பான வரிகள், ரெஜிஸ்ட்ரியில் இருந்து கொண்டு இந்த சாஃப்ட்வேரினை இயக்குகையில் கம்ப்யூட்டரை கிராஷ் ஆகும் நிலைக்கு கொண்டு வரலாம்.
ரெஜிஸ்ட்ரியைச் சுத்தம் செய்திடவென வடிவமைக்கப்பட்ட புரோகிராம்களைக் கொண்டு அதனைச் சரி செய்திட வேண்டும். இல்லையேனில் மீண்டும் விண்டோஸ் இயக்கத்தினை இன்ஸ்டால் செய்திட வேண்டியதிருக்கும்.

இப்போது வருகின்ற சிபியுக்கள் மீது சிறிய மின் விசிறிகள் பொருத்தப்பட்டு சிபியு இயக்கத்தின் போது உருவாகும் வெப்பம் வெளிக்கடத்தப்படுகிறது. சிபியு அதிக சூடானாலும், அதிக குளிர்ச்சியினால் பாதிக்கப்பட்டாலும், கெர்னல் ஏரர் (Kernal error) என்று ஒரு பிரச்சனை ஏற்படும். பொதுவாக எந்த வேகத்தில் ஒரு சிபியு இயங்க வேண்டுமோ அதனை காட்டிலும் அதிக வேகத்தில் இயங்கும் வகையில், சிபியு செட் செய்யப்பட்டருந்தாலும் அதிக வெப்ப பிரச்சனை ஏற்படும். எனவே சிபியு விண் வேகத்தினை பயாஸ் செட்டிங்ஸ் சென்று குறைக்க வேண்டும்.கம்ப்யூட்டருக்கு செல்லும் மின் ஒட்டத்தினை சீராகத் தரும் சாதனங்களை கொண்டு தராவிட்டால், கிராஷ் ஆகும் வாய்ப்புகள் அதிகம் உண்டு.

உங்கள் கையெழுத்தை font ஆக மாற்றுவது எப்படி???

signஉங்களது சொந்த கையெழுத்தை ஒரு எழுத்துரு (font) ஆக மாற்ற உதவும் ஒரு சிறிய, சிறந்த மென்பொருள் தான் scanahand-free.
செய்முறை : இவ் மென்பொருளில் இருந்து பெற்றுக்கொள்ளப்படும் வடிவமைப்பை print செய்துகொள்ளுங்கள். print செய்யப்பட்ட தாளில் குறிப்பிட்ட படி ஒவ்வொரு எழுத்திற்கு கீழேயும் உங்கள் கையால் எழுத்தை எழுதுங்கள். (கறுப்பு marker அல்லது கறுப்பு தடித்த பேனாவை* பயன்படுத்தவும்.) பின்னர் எழுதப்பட்டதை scan செய்து மென்பொருளுடன் இணைக்கவும். அவளவும் தான், உடனடியாக உங்களது தனித்துவ எழுத்துரு தயாராகிவிடும்
windows கணினிகள் மற்றும் mac கணினிகளுக்கு பயன்படுத்த கூடியதாக அந்த எழுத்துருக்கள் இருப்பதுடன். இணையத்தளங்களிலும் இணைய எழுத்துருவாக பயன்படுத்த இந்த மென்பொருள் உதவுகிறது.

ஞாயிறு, 17 ஆகஸ்ட், 2014

ஆன்ட்ராய்ட் அப்ளிகேஷன்களை கூகுள் பிளே ஸ்டோரிலிருந்து கணினியில் பதிவிறக்கம் செய்ய

கூகுள் பிளே ஸ்டோரில் உள்ள அப்ளிகேஷன்களை நேரடியாக கணினியில் பதிவிறக்கம் செய்வது எவ்வாறு என்று ஏற்கனவே எழுதியிருந்தேன் . அது ஒரு மென்பொருள் உதவியுடன் பதிவிறம் செய்வது ஆகும். ஆனால் இந்த முறைமையானது ஆன்லைன் உதவியுடன் ஆன்ட்ராய்ட் அப்ளிகேஷனை பதிவிறக்கம் செய்வது எவ்வாறு என பார்ப்போம். ஆன்ட்ராய்ட் பற்றியோ கூகுள் பிளே ஸ்டோர் பற்றியோ பெரிய முன்னுரை தேவையில்லை என்று நினைக்கிறேன்.
ஆன்ட்ராய்ட் என்பது கூகுள் நிறுவனத்தின் மொபைல்/டேப் களுக்கான இயங்குதளம் ஆகும். இந்த இயங்குதளத்தில் இயங்கும் அப்ளிகேஷன்களுக்கென ஒரு சந்தையினை உருவாக்கியது அதற்கு பெயர் தான் பிளேஸ்டோர் ஆகும். இச்சந்தையில் தற்போது கூகுள் நிறுவனத்தின் சோதனைக்குட்பட்ட மென்பொருள்கள் மட்டுமே உள்ளன.
கூகுள் பிளே ஸ்டோரில் இருக்கும் அப்ளிகேஷன்களை நாம் நேரிடையாக கணினியில் பதிவிறக்கம் செய்ய முடியாது. ஆன்ட்ராய்ட் இயங்குதளம் நிறுவப்பட்ட மொபைல் சாதனம் மற்றும் டேப்  லிருந்து மட்டுமே ஆன்ட்ராய்ட் அப்ளிகேஷன்களை பதிவிறக்கம் செய்ய முடியும்.
கூகுள்பிளேஸ்டோரில் இருக்கும் அப்ளிகேஷன்களை கணினியில் பதிவிறக்கம் செய்ய ஒரு தளம்  உதவி செய்கிறது.
தளத்திற்கான சுட்டி 

எந்த அப்ளிகேஷனை பதிவிறக்கம் செய்ய வேண்டுமோ அதற்கு குறிப்பிட்ட அப்ளிகேஷனின் URL முகவரி கண்டிப்பாக வேண்டும். URL முகவரியினை பெற பிளேஸ்டோர் சென்று குறிப்பிட்ட அப்ளிகேஷனின் முகவரியினை பெற்றுவிட முடியும்.


சுட்டியில் குறிப்பிட்ட தளத்திற்கு சென்று, குறிப்பிட்ட அப்ளிகேஷனின் முகவரியை (url) குறிப்பிட்டு பின் Generate Download Link என்னும் பொத்தானை அழுத்தவும். சில நொடிகளில் பதிவிறக்கம் செய்வதற்கான சுட்டி கிடைக்கும் அதை பயன்படுத்தி கணினியில் பதிவிறக்கம் செய்து கொள்ள முடியும்.


கணினியில் தரவிறக்கம் செய்யும் ஆன்ட்ராய்ட் மென்பொருள்களை வழக்கம்போல் ஆன்ட்ராய்ட் சாதனங்களில் பயன்படுத்திக்கொள்ள முடியும்.


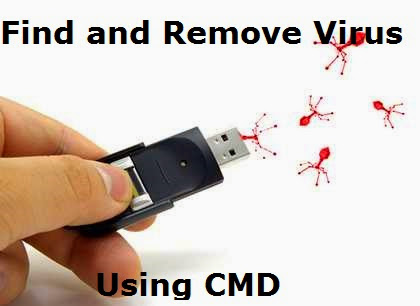
How to Find & Remove Viruses in Windows using Command Prompt


Hello friend messing up with some virus? Though your antivirus software removes virus and problem persists, searching google for the removal and you are into a perfect site for a solution. Virus is a computer program that can copy itself and infect your computer. These viruses can spread via USB/flash drive or from one computer to other computer by few written codes.

There are many antivirus software available to remove viruses from computer. But there are some viruses or suspicious files which can’t be removed by any antivirus software. Some suspicious files such as autorun.inf initiate all the viruses in pc.

Remove virus using CMD

These files must be removed for safe operation of your pc, because they may lead to data loss, software damages etc.Here's a trick to remove all your viruses. Follow the steps given below to remove viruses using cmd ( command prompt )

Finding & Removing Viruses Using Command Prompt


Follow the below guide only if you think any of your drive is affected with virus or if you think there are some harmful files and you want to delete them.

Step 1: Go to start menu and type “cmd” in the search box or Start>all programs>accessories>command prompt.

Step 2: Select the infected drive,to do so type in CMD , D: to go to D: drive.

Step 3: Now type dir/w/a . It will show all the files of the drive including hidden files.

Now Check if there is any file or virus that you are not aware of and you think might be Harmful to your PC.

Step 4: Usually there is Autorun.inf file which you must delete it. to do so Type in attrib -h -r -s autorun.inf  and press Enter. Type del autorun.inf  and press Enter. Follow this for all other drives.

Step 5: We have now Succesfully found and deleted autorun.inf file from D drive. if you find any .exe file which is unknown to you. then delete it using the same above method.

How to remove Shortcut virus using cmd ?

The Shortcut viruses are those which converts all your data from your pen drive or Hard disk to shortcuts, but they are recoverable. just follow the below given steps to remove shortcut virus from pen drive and recover back your files.

  • Go to Start -> Run -> cmd.
  • Go to your pen drive directory.
  • Type this command: del *.lnk and press Enter.
  • Type attrib -h -r -s /s /d e:\*.* And then press Enter.

Recover your files :

You can recover your files through Winrar.

  1.  Open WINRAR Application.
  2. Navigate to your Pendrive location or PC Folder location.
  3. Copy Files and Paste where you want.
  4. Format your Pendrive. 

Got some Files in your pen drive but they are empty! Because of the virus in your pendrive malfunctions your drive. How to remove this empty folder virus and recover files? Follow the steps given below.
  • Start -> Run -> cmd.
  • Type this command: attrib -h -r -s /s /d x:\*.* 
  • Here the letter "x" should be replaced with the drive alphabet of your pendrive that you have inserted into the computer.
  • If your pendrive shows the drive alphabet as "J", then type  this command: attrib -h -r -s /s /d j:\*.* And then press Enter.

Restart your Pc for the changes to take place... So these were some methods to find and remove different viruses using Command Prompt. I hope this will help many of my Readers.
If You Like This Post Please Mind to Share It.

சனி, 16 ஆகஸ்ட், 2014

4 Ways to Get Paid Android Apps for Free

We love apps. We love free apps. And we love paid apps that cost nothing most of all. But we don't like pirates, so if you have an eye patch on your face and a parrot on your shoulder, be gone with ye! Having said that, there's plenty of legal ways to get paid apps for free for your Android so today we're going to share a few with you.

There are millions of premium apps available on the Google Play Store and other app stores such as Amazon, you can’t get these apps free, instead you’ve to pay in order to get your favorite Android app for free. Today we’re going to discuss a few ways you can get the paid Android apps for free.

4 Ways to Get Paid Android Apps for Free


1.App Gratis:

It offers new app for free daily. No overloading of other apps- just one app a day. Sometimes the free apps offered by App-gratis won’t be eligible for updates. You better ignore this negativity because deals keep coming and often there is gem of an app. Nevertheless, the AppGratis deals just keep coming and there's often some real gems in there.


2. Amazon App of the day:

Amazon app store for Android is one of the best app store for mobile devices and there is no doubt that it is still giving tough competitor of Google Play store. It is doing everything to drag its consumers back from Google play store. For now they offer free app every day. 

Just go to Amazon app of the day to see which app they are offering currently. Download the Amazon app of the day or grab a notification app like free app Notifier for Amazon.

3. App of the Day

App of the Day does basically the same thing as AppGratis and Amazon, offering a paid app for free (or discounted) for a limited time only. There's lots of different versions of this app, so you need to get the one relevant to your location (otherwise the Play Store will tell you it is incompatible with your devices), but once you've got it installed you can add it to your daily check list for scoring paid apps for free. 

I should also note that other apps, like App Sales, let you add apps you're interested in to a watch list, so you can be notified when they go on sale. Not exactly free but still better than full price. Plus, App Sales occasionally post free apps too.


4.Google Play returns Policy:

If you are confuse whether you should pay for certain game or not this app is a must have app for you. It lets you try that game for 15 minutes. I know 15 minutes may not be enough to know the game but these minutes are more than enough to feel whether the game is worth your money or not.

These were all the possible ways to get paid android apps for free and the legal way. Hopefully you like it and give it a try if you really need some premium apps. Do let us know and share your own views in the comment section below. For Android Tips and App reviews keep visiting

If You Like This Post Please Mind to Share It.

Collection of Windows 8 Shortcut Keys to save your Time

Shortcut keys in Windows means We can Perform Specific Task by just pressing a key or Combination of keys which saves us time and helps us to explore more about our windows PC. We often use Basic shortcut keys, but the use is really limited to 4 or 5 shortcut keys to perform basic tasks.

Today in this article i will share Collection of Windows 8 Shortcut keys that will ease up your Task performing exerience and will save your lot of time.

Collection of Windows 8 Shortcut Keys

Windows 8 Shortcut Keys 
 
1. Windows + T - Go to first item in Taskbar, continue with arrow keys
2. Windows + U - Open Ease of Access Centre
3. Windows + X - Open Power User Commands on Desktop
4. Windows + S - Search Settings
5. Windows + P - Display Projection Options
6. Windows + O - Disable screen rotation / orientation
7. Windows + R - Open Run dialog box
8. Windows + Q - Open Windows Apps Search
9. Windows + W - Search in Windows Settings
10. Windows + M - Minimize all Windows
11. Windows + N - Create new One Note
12. Windows + L - Lock your computer
13. Windows + Shift + M - Restore minimized Windows
14. Windows + Ctrl + F - Search for Computers in a network
15. Windows + F - Search for the Files in Computer
16. Windows + H - Open Share Panel
17. Windows + B - Set focus to Notification Area
18. Windows + E - Show Windows Explorer with File’s Tree View
19. Windows + E - Show Windows Explorer with File’s Tree View
20. Windows + K - Open Device Connections
21. Windows + C - Open Charms bar
22. Windows + I - Open settings including Control Panel, PC Info, Desktop, Personalization, Help
23. Windows + J - Toggle foreground between the filled and snapped applications
24. Windows + D - Toggle “Show Desktop”
25. Windows + Enter - Open Windows Narrator
26. Windows + Spacebar - Change the Keyboard Layout / Input Language
27. Windows + Page Down - Move Start Screen to the right side of screen
28. Windows + Alt + Enter - Open Media Center (If Media Center is Installed on your PC
29. Windows + Page Up - Move Start Screen to the left side of screen
30. Windows + Down Arrow - Minimize / Restore the currently active Windows
31. Windows + Up Arrow - Maximize the currently active Windows
32. Windows + Right Arrow - Dock the current Windows to right half of the screen
33. Windows + Left Arrow - Dock the current Windows to left half of the screen
34. Windows + Minus - Magnifier Zoom-Out
35. Windows + Plus - Magnifier Zoom-In
36. Windows + Esc - Close Magnifier
37. Windows + Shift + Right Arrow - Move the currently active Windows to the right side of monitor
38. Windows + Shift + Left Arrow - Move the currently active Windows to the left side of monitor
39. Windows + Shift + Down Arrow - Minimize / Restore the currently active Windows vertically, while maintaining its width
40. Windows + Shift + Up Arrow - Maximize the currently active Windows vertically, while maintaining its width
41. Windows + F1 - Open Windows Help and Support
42. Windows + Break - Display System Properties dialog box
43. Windows + Ctrl + Tab - Toggle through Applications and snap them as they cycle
44. Windows + Tab - Toggle through all Applications
45. Windows + Shift + Tab - Toggle through Applications in reverse order
46. Windows + Forward Slash (/) - Initiate IME (Input Method Editor) reconversion
47. Windows + Shift + Dot (.) - Move the gutter to the left
48. Windows + Dot (.) - Move the gutter to the right
49. Alt + T - Cut
50. Alt + V - Paste
51. Alt + P + E - Display Open With… dialog box
52. Alt + W - Create a new document or select a template
53. Windows + Comma - Temporarily view desktop
54. Alt + S + I - Invert the selection
55. Alt + R - Rename selected files
56. Alt + P + S - Insert label
57. Alt + D - Delete selected files or folder
58. Alt + P + R - Open properties
59. Alt + M - Move the files
60. Alt + S + A - Select all
61. Alt + C + P - Copy path to the file or folder
62. Alt + A - Open the special features.
63. Alt + E - Edit selected files
64. Alt + C + O - Copy selected items
65. Alt + H - Shows history of file versions
66. Alt + S + N - Deselect
67. Alt + N - Create a new folder
68. Alt + Shift - Change Keyboard Language layout if multiple language layouts are active
69. Ctrl + Mouse Scroll Wheel - Change Size of Icon
70. F11 - Toggle Full Screen Mode

I hope you will like this huge Collection of Windows Shortcut keys, if you would like to add some more shortcut keys that may be useful then feel free to share it in Comments Box below
If You Like This Post Please Mind to Share It.

How to Use Pendrive as RAM in Windows


In this Technology World, almost Every Student and Computer user own a Pendrive. Some may own Couple of them. Pendrive is Used to Store Important Data or to transfer files from one computer to another. but do you know that you can Use Pendrive as RAM and Boost your PC performance?

You might be now Anxious to know How to use Pendrive as RAM Right? You must be Because RAM plays an important part for your PC performance. With the Introduction of Readyboost Feature in Windows, it has become easier to Boost your PC and speed it up.

How to Use Pendrive as RAM with Readyboost

To use your Pendrive as RAM, You have to make Sure that you have a Pendrive which have a Free Storage Capacity of 4GB.

A pendrive with 8gb capacity is Highly Recommended to perform this Task

Step 1: Insert your 4GB or 8GB Pendrive.

Step 2: Take a Backup of any data already present in your pendrive, Because its adivisible to format your pendrive before moving forward.

Step 3: Now goto My Computers and Right Click on your Pendrive to Select Properties.

Step 4: Click on Readyboost Tab, Now wait couple of seconds so that it analyzes your Pendrive, Next you will see something like below Picture

Use Pendrive as RAM in Windows

Step 5: Click on Use this Device, Select the number of MBs you want to use out of total space, Then Click on Apply

Step 6: Next you will see Readyboost is Configuring your Cache, When its Done, Just reboot your PC to Feel the Difference

TIP: Once you Start using ReadyBoost Feature, you will have to Practice to Remove your Pendrive Safely Before Ejecting it to Avoid any trouble.

This was a Very simple and Effective Step by Step Guide on How to Use Pendrive as RAM in Windows PC. I hope this article will help you and so will you Share it on Social Media to Help us Grow. Don't Forget to Read more Interesting and Helpful articles on our Blog.

If You Like This Post Please Mind to Share It.

Trick to Use Android Smartphone as WebCam


If you do not own a WebCam, then you can now easily use your smartphone as Web Camera. If your Smartphone have good Camera quality then its even better. Web Camera Comes really handy when you wish to video chat with your friends or family members.
Use Android Smartphone as WebCam

By using your Android Smartphone as Web camera, you will even save Money and its very useful when you need a web cam urgently and your web cam don't Work Proberly.

We will Be using an APP to perform this trick. Other things you need is a USB cable to Connect your Smartphone to PC.

Steps to use Android Smartphones as Web Camera

Step 1: Download and Install DroidCam app on your Android Smartphone.

Step 2: Download DroidCam Windows Client and install it on your PC.
Install it as just you install other Softwares. it will automatically Install all the required Drivers.

Step 3: Once you have Downloaded and installed DroidCam on your Smartphone and PC, its time to connect your Smartphone to PC using USB Cable, Make sure to enable USB Debugging on your Smartphone.

Step 4: Once your smartphone is connected to your PC, Its Time to open DroidCam app on your Smartphone and the Windows Client on your PC. Click on USB icon and then Click "START"

Step 5: Thats it, now you will see the Magic On your Screen. Enjoy!!

These above steps should work well but if you find it difficult to Perform this trick then Visit this link to know more.

If you Still have any Trouble then Feel free to Comment in below Comment box.
If You Like This Post Please Mind to Share It.

5 Best Notepad Tricks that will Amaze you


Do you Think Notepad can be just used as Text Editor ? Do you Use notepad just to Save text and some other data? If Yes, Then you are missing out Some Cool and Interesting Notepad Tricks that you can Perform on your Computer.

Notepad Comes as an inbuilt app in all Versions of Windows. But Today i am Going to Share 5 Cool Notepad Tricks that you can Perform on your Computer because they are Harmless. The Below tricks that i am about to share will not harm your Computer in any way, Instead you will be Stunned to Learn something new that Notepad Can do for you.

5 Notepad Tricks that you can Perform now


Best Notepad Tricks 

 1) Matrix Effect:

We Have Seen alot of times in movies some kind of numbers in Green Color Flashing really fast. Ever Wondered How they do it ? 

Well, Today you will learn it. Basically its a Small Batch file that helps to do it. Just follow the Below simple steps to do it yourself.

Step 1: Open Notepad. 

Step 2:  Now Copy the Below Code.

@echo off

color 02

:start

echo %random% %random% %random% %random% %random% %random% %random% %random% %random% %random%

goto start

Step 3: Paste the Code in Notepad and Save it by Clicking on File and then Save.

Step 4: You will be now asked the file name and Save as Type, So name the file as Matrix.bat and Choose All files in save as type.

Step 5: Remember the Destination where you save the file. Now Navigate to the Location where you saved this file. Double Click on it to See the Magic.

2. Ghost Keyboard Typing:


This is a Technique by Which you can make Notepad type Automatically whatever you want. That means i will share a script which you will use to Display anything you want to and Notepad will automatically type it for you.

Step 1: Open Notepad

Step 2: Copy the Below code.

set wshshell = wscript.CreateObject("wScript.Shell")
wshshell.run "Notepad"
wscript.sleep 400
wshshell.sendkeys "T"
wscript.sleep 100
wshshell.sendkeys "R"
wscript.sleep 120
wshshell.sendkeys "I"
wscript.sleep 200
wshshell.sendkeys "C"
wscript.sleep 100
wshshell.sendkeys "K"
wscript.sleep 140
wshshell.sendkeys "S"
wscript.sleep 100
wshshell.sendkeys "L"
wscript.sleep 50
wshshell.sendkeys "O"
wscript.sleep 120
wshshell.sendkeys "V"
wscript.sleep 170
wshshell.sendkeys "E"
wscript.sleep 100
wshshell.sendkeys "."
wscript.sleep 120
wshshell.sendkeys "C"
wscript.sleep 160
wshshell.sendkeys "O"
wscript.sleep 200
wshshell.sendkeys "M"
wscript.sleep 100

Step 3: Paste the Code in Notepad and Save it.

Step 4: Name it Trickslove.vbs and Choose All files in Save as type.

Step 5: Double Click on the saved file to See this Live Notepad Trick

3. Make your Computer Speak:


In the Above trick we made notepad Type automatically but now we will our own text to Speech tool with the help of small script in Notepad. You will make your Computer Speak whatever you type. Excited ? Then follow the Below Simple Steps.

Step 1: Open Notepad

Step 2: Copy and Paste the Below Code in Notepad.

Dim message, sapi
message=InputBox("What do you want me to say?","Speak to Me")
Set sapi=CreateObject("sapi.spvoice")
sapi.Speak message 

Step 3: After Pasting the Above Code in Notepad, its time to Save the File. Save the File with name Speak.vbs and again choose All files in save as type

 
Step 4: Double Click on the File to See a pop up Window that looks something like this Picture

Now All you have to do is Type in Anything that you want it to Convert in Speech.

Then Click on Ok. Wait a second or Two and hear it do its work.


4. Keyboard LED lights Dancing Trick


This is another Fun Trick which will Make your Keyboard Lights ie: Numlock,Capslock and Scroll lock lights go dancing..

Step 1: Open notepad.

Step 2: Copy the Below Code and paste in it.

Set wshShell =wscript.CreateObject(“WScript.Shell”)
do
wscript.sleep 100
wshshell.sendkeys “{CAPSLOCK}”
wshshell.sendkeys “{NUMLOCK}”
wshshell.sendkeys “{SCROLLLOCK}”
loop

Step 3: Save the File with the name Led.vbs and again choose all files.

Step 4: Double click the File to open, Look down at your keyboard to See the live performance.

How to Stop:

To Stop it just follow the Below Simple Steps.

  • Open Task manager by Pressing CTRL+ALT+DELETE
  • Now Goto Process Tab
  • Scroll down and search for wscript.exe and End the Process.

5. 9/11 Attack.


Do you know that World Trade Center Attact can be Seen in Notepad? If you are not aware of this trick then here is how to do it.

Step 1: First of all you will Open new notepad file.

Step 2: Type in Q33N

Step 3: Click on Format > Font> and Select font as "Wingdings" now Increase the font size to 72

You will be Amazed to See What notepad Displays you.

So with this It Concludes the list of 5 Best Notepad Tricks for 2014. If you enjoyed it then please care to Share it on Social media using the Below Buttons.


If You Like This Post Please Mind to Share It.

Best Command Prompt (CMD) Tricks That you must know.


I like to Explore more about Windows, I often use Command prompt to get things done Pretty fast simply by typing Commands in CMD. Command prompt is not much used by people to perform tasks may be because users do not know how exactly to use it.

Cmd is been ignored by the users but actually its a very powerful tool and is not Useless at all.  With Command prompt you can not just Perform tasks easily but also you can have fun with it.While using CMD i have discovered many Awesome Command prompt tricks that i would like to share here.

5 Best Command prompt Tricks


Starting CMD:

Before moving futher with the Tricks, let me show you how to Open Command prompt in various Windows versions.

Press Win + R keys to open up RUN, type in CMD and press enter to open Command Prompt.

OR

Simply Search for CMD or Command prompt and click on it to open Command Prompt in your Windows PC

1. Change Colours in CMD:


By default CMD have Black Background, but you can change its Background Color and font color too. Follow the Below steps to Play with Colors in Command prompt.

Step 1: Open Command prompt

Step 2. Type in Color 3 to change the Font color to Green. Different Colors have thier own different Codes. here are some Codes that you can try and use
0 = Black
1 = Blue
2 = Green
3 = Aqua
4 = Red
5 = Purple
6 = Yellow
7 = White
8 = Gray
9 = Light Blue
A = Light Green
B = Light Aqua
C = Light Red
D = Light Purple
E = Light Yellow
F = Bright White

Step 3: To change the Background Color of your CMD, simply Right Click on Top of your CMD and choose Properties.

Step 4: Now Click on Colors tab to choose your favourite color as Background color.

2. Check your I.P address and more about your internet.


With the help of Command Prompt you can easily find your IP address and DNS servers, command prompt will also return a ton of information like your host name, primary DNS suffix, node type, whether IP Routing, Wins Proxy, and DHCP are enabled, your network adapter`s description, your physical(MAC) address.

Step 1: Open CMD

Step 2 : Type in ipconfig /all

This will show you all the details about your internet Connection just like that.
 
3.Get Help from Command prompt.

If you are Confused and Do not know what command does what task. Then you can simply ask Command prompt to help you understand what task with the Command Perform on execution.

Simply Type in this format YourCommand/?  to get all details what that command will do. For eg: Type color 3/? to know what Color 3 command do. it will show you that color 3 command will change the font colour of your CMD. Likewise you can check for any given command.

4.Use && to run more than one command in a single line


When you want to execute more than one command in a single line use the && operator.

For Eg: hostname && whoami

The above command will display both your computer name as well the logged in user name.

5.Hide/Unhide Files and Folders


Another awesome CMD trick by which you can Hide any files or folder using CMD and you can unhide it easily too.

Yes there is a Command for it which we will execute in order to perform this trick so lets see how this is done.

Step 1: Open CMD

Step 2: Type this Command  without Quotes> "attrib +s +h Your_File_location" . Your_File_Location means the place where your files is located in your Hard disk. For Eg: I want thide a folder with name "Videos" which exists in my "D" drive, then i will Type "attrib +s +h D:\Videos" 

Step 3: The Above Command will hide my Videos folder from D drive. To Unhide it just Type this command "attrib -s -h D:\Videos"

Only Difference between both the Command is "+" & "-" Signs. 

So these were 5 Best Command Prompt Tricks for you. Do it yourself and let me know in Comment box if you like them.
If You Like This Post Please Mind to Share It.

ஞாயிறு, 10 ஆகஸ்ட், 2014

Android Mobile களின் புதிய இரகசிய குறியீடுகள் (Hidden Secret Codes)

Android Mobile களின் புதிய இரகசிய குறியீடுகள் (Hidden Secret Codes) கள் இதோ
முதலில் இதை உங்கள் நண்பர்களுக்கு Share பண்ணுங்க , நீங்க Share பண்ணா ஒருவருக்காவது பயன்படும்


☆★☆ --------> Hidden Secret Codes <-------- ☆★☆
*#06# – IMEI number
*#0*# – Enter the service menu on newer phones like Galaxy S III
*#*#4636#*#* – Phone information, usage statistics and battery
*#*#34971539#*#* – Detailed camera information
*#*#273282*255*663282*#*#* – Immediate backup of all media files
*#*#197328640#*#* – Enable test mode for service
*#*#232339#*#* – Wireless LAN tests
*#*#0842#*#* – Backlight/vibration test
*#*#2664#*#* – Test the touchscreen
*#*#1111#*#* – FTA software version (1234 in the same code will give PDA and firmware version)
*#12580*369# – Software and hardware info
*#9090# – Diagnostic configuration
*#872564# – USB logging control
*#9900# – System dump mode
*#301279# – HSDPA/HSUPA Control Menu
*#7465625# – View phone lock status
*#*#7780#*#* – Reset the /data partition to factory state
*2767*3855# – Format device to factory state (will delete everything on phone)
##7764726 – Hidden service menu for Motorola Droid
Update x1: More codes!
*#*#7594#*#* – Enable direct powering down of device once this code is entered
*#*#273283*255*663282*#*#* – Make a quick backup of all the media files on your Android device
*#*#232338#*#* – Shows Wi-Fi MAC address
*#*#1472365#*#* – Perform a quick GPS test
*#*#1575#*#* – For a more advanced GPS test
*#*#0283#*#* – Perform a packet loopback test
*#*#0*#*#* – Run an LCD display test
*#*#0289#*#* – Run Audio test
*#*#2663#*#* – Show device’s touch-screen version
*#*#0588#*#* – Perform a proximity sensor test
*#*#3264#*#* – Show RAM version
*#*#232331#*#* – Run Bluetooth test
*#*#232337#*# – Show device’s Bluetooth address
*#*#7262626#*#* – Perform a field test
*#*#8255#*#* – Monitor Google Talk service
*#*#4986*2650468#*#* – Show Phone, Hardware, PDA, RF Call Date firmware info
*#*#1234#*#* – Show PDA and Phone firmware info
*#*#2222#*#* – Show FTA Hardware version
*#*#44336#*#* – Show Build time and change list number
*#*#8351#*#* – Enable voice dialling log mode, dial *#*#8350#*#* to disable it
##778 (+call) – Show EPST menu
Codes specific to HTC devices only:
*#*#3424#*#* – Run HTC function test program
*#*#4636#*#* – Show HTC info menu
##8626337# – Run VOCODER
##33284# – Perform field test
*#*#8255#*#* – Launch Google Talk service monitor
##3424# – Run diagnostic mode
##3282# – Show EPST menu
##786# – Reverse Logistics Support
Copyright : இலவச மென்பொருட்கள்
Enjoy
உங்கள் நண்பர்களுக்கு Share பண்ண மறந்துவிடாதீர்கள்
====================================================
ஏதாவது சந்தேகம் இருந்தால் Comment Box இல் கேளுங்கள்
இது உங்களுக்கு பிடித்து இருந்தால் Like மற்றும் உங்கள் நண்பர்களுக்கு Share செய்யுங்கள்

சனி, 9 ஆகஸ்ட், 2014

ROOT செய்த மொபைல்களில் இருக்க வேண்டிய அதிமுக்கியமான ஐந்து அப்ளிகேஷன்ஸ் ..

*****************************************************
Root என்றால் என்ன? அதை எப்படி செய்வது?
...
அதை தெரிந்துகொள்ள இங்கு செல்லுங்கள் --->
(கணினியுடன் )

http://infomaszz.blogspot.in/2014/08/how-to-root-your-android-mobile-with.html
*****************************************************
கணினி இல்லாமல் --->

http://infomaszz.blogspot.in/2014/08/how-to-root-your-android-mobile-without.html
*****************************************************
1.) TITANIUM BACKUP (கண்டிப்பாக இருக்கவேண்டும்)
இது ஒரு சக்திவாய்ந்த backup அப்ளிகேஷன் ,, இதில் அப்ளிகேஷன்களை "DATA"வுடன் Backup,Restore செய்யலாம் ,,
....
அதாவது நீங்கள் ஒரு கேமில் 100 Coins சேர்த்துவிட்டு ,அந்த கேமை இதன்மூலம் backup செய்துவிட்டு ,அதை Uninstall செய்து இதன்மூலம் Restore செய்தால் 100 Coins அப்படியே இருக்கும் !!
...
இது மட்டும் இல்லை ,இன்னும் நிறைய Features உள்ளன...
*****************************************************
2.) Link2SD (குறைந்த மெமரி போன்களுக்கு)
இது அப்ளிகேஷன்ஸை SD Card(Memory Card)க்கு Move செய்ய பயன்படும் அப்ளிகேஷன் ..
Memory Cardஐ Partion செய்து 2nd Partionக்கு அப்ளிகேஷன்ஸை "Link" செய்யலாம் ..
((Memory Cardஐ Partion செய்வதை பற்றி பின்வரும் பதிப்புகளில் பார்க்கலாம் ))
*****************************************************
3.)ROM Toolbox Pro (போனை மாற்றியமைக்க நினைப்பவர்களுக்கு)
இதின் Featuresஐ சொல்லிக்கொண்டே போகலாம் ..
இந்த அப்ளிகேஷன் மூலம்
*Fonts
*Bootanimation
*Battery Icon
*Notifcation Icons
அகியவற்றை மாற்றலாம் ...
...
*CPU Control
CPU (Processor)ன் வேகத்தை அதிகபடுத்தலாம் ,கம்மியாக்கி கொள்ளலாம்
*SD Card Booster
உங்கள் SD Cardன் Read/Write வேகத்தை அதிகப்படுத்தும்...
...
இன்னும் ஏராளமான Features உள்ளன ,,
*****************************************************
4.) RAM MANAGER PRO (RAM Memory குறைவாக இருக்கும் போன்களுக்கு)
இது குறைந்த RAM அளவை பெற்றிருக்கும் மொபைல்களுக்கு ..
...
இதில் 5 வகையான Modes இருக்கின்றன
*Balanced
*MultiTasking
*Gaming
*Hard MultiTasking
*Hard Gaming
...
SWAP FILE ("RAMஐ INCREASE செய்வது !)
உங்களுக்கு தேவையான அளவை தேர்ந்தெடுத்து கொள்ளுங்கள்
....
*****************************************************
5.) NO-FRILLS CPU CONTROL
இது உங்கள் Processorன் வேகத்தை கட்டுப்படுத்த உதவும் அப்ளிகேஷன் ...
...
இதன்மூலம் Frequencyஐ அதிகப்படுத்தி போனை வேகமாக இயங்க வைக்கலாம் ..
...
அல்லது
...
Frequencyஐ குறைத்து Battery Lifeஐ அதிகப்படுத்தலாம் !!
*****************************************************
Lucky Patcher
இது Titanium Backup ,ROM Toolbox ஆகியவற்றை Pro versionஆக மாற்ற உதவும் அப்ளிகேஷன் ..
..
அது மட்டும் அல்ல ..இது மூலம் அப்ளிகேஷன்களில் தோன்றும் "Ads"ஐ remove செய்து கொள்ளலாம் ...
*****************************************************
-DOWNLOAD LINKS -
(Z Archiver அல்லது ES File Explorerஐ பயன்படுத்தி Extract செய்யுங்கள்)
1.) Titanium backup
https://www.dropbox.com/s/n3mtxojfyyuhf9a/TBP_v6.1.5.4_apkdatas.blogspot.com.zip
2.) LInk2SD Plus
https://www.dropbox.com/s/nt5wifsdrulkc2k/Link2SDPlusl.rar
3.) ROM Toolbox
http://www20.zippyshare.com/v/28084213/file.html
4.) RAM Manager Pro
http://www41.zippyshare.com/v/40845409/file.html
5.) NO-Frills CPU
https://www.dropbox.com/s/5f6d0kk58vfu87z/No-frills%20CPU%20Control_1.26-r1.apk
..
Lucky Patcher
https://www.dropbox.com/s/zo3qixmb8blgpkv/LuckyPatcher.apk
*****************************************************
இது உதவியாக இருந்தால் உங்கள் நண்பர்களுக்கு பகிருங்கள் (Share)
...
#Shyam

How to ROOT your Android Mobile Without Computer..(கணினி இல்லாமல்) II

நீங்கள் அனைவரும் எதிர்பார்த்து கொண்டிருக்கும் பதிப்பு !!
.
.
.
.
மொபைலை கணினி இல்லாமல் root செய்வது எப்படி ??


http://cdn-www.xda-developers.com/wp-content/uploads/2014/01/Root.jpg
Loading...
.
.
அதை செய்வது மிக சுலபம் !!

நாம் அதற்கு use செய்யப்போகும் அப்ளிகேஷன்னின் பெயர் " ||FRAMAROOT ||

இதை பற்றி சொல்ல பெரிதாக ஒன்றுமில்லை. .

இது root செய்ய பயன்படும் அப்ளிகேஷன் ..

-->( தயவுசெய்து உங்கள் mobile support ஆகுமா என்று கேட்காதிர் ,, ஏன் என்றால் எனக்கே தெரியாது ))<--

++இதை use செய்து உங்கள் phoneஐ நீங்கள் root செய்தால் commentsல் தெரிவிக்கவும் ,என்னெனில் மற்றவர்களுக்கும் பயன்படும் ++

(( இதனால் உங்கள் phoneக்கு எந்த தீங்கும் நேராது ,, ஆனால் warranty காலி ))

அதெல்லாம் ஒக்கே இதை எப்படி use செய்வது ??
.


,, அப்ளிகேஷன்னை open செய்தவுடன் கீழே root என்று இருக்கும் ..,அதை touch செய்தால் போதும் ..!!((அப்படி root என்று காமிக்கவில்லை என்றால் உங்கள் phone support ஆகவில்லை என்று அர்த்தம் ))
rooted என்று அப்ளிகேஷன் சொன்
உங்கள் mobile rooted!!
.
.
.
சரி root ஆகிவிட்டதற்கு என்ன அடையாளம் ??
.
.
உங்கள் app listல் " SUPER SU" என்று app இருந்தால் உங்கள் phone rooted..
.
சரி இந்தங்கோ Download Link,,
https://www.dropbox.com/s/pilem63q7le9rzg/Framaroot-1.9.1.apk

-->>((உங்கள் mobile root ஆகவில்லை என்றால் ,, என்னால் எதுவும் செய்யமுடியாது))<<---

உங்கள் mobile root ஆகுவதற்கு வாழ்த்துக்கள் !!

root செய்தவர்கள் மகிழ்ச்சியில் அப்படியே இருக்காதிர்,, உங்கள் mobileன் model number உடன் rooted என்று comment செய்யுங்கள் ..

தயவுசெய்து share செய்யுங்கள்!!
.
.
இப்படிக்கு ,,

உங்கள் || shyam ||

நன்றி !!

How to ROOT your Android Mobile With Computer..(கணினி இருப்பது அவசியம்)


ஆண்ட்ராயிட் மொபைலை Root செய்வது எப்படி? (கணினி இருப்பது அவசியம்)
  
((இதனால் உங்கள் phoneக்கு எந்த தீங்கும் நேராது ,, ஆனால் warranty காலி

))http://img.talkandroid.com/uploads/2012/11/Rooting.jpg


அதனால் ஏற்படும் நண்மைகள் மற்றும் தீமைகள...  ஆண்ட்ராயிட் மொபைலில் ROOT
செய்வது என்று கூறுகிறார்களே அப்படி என்றால்  என்ன என்ற கேள்வி பொதுவாக பலரிடமும் காணப்படுகி றது. அதற்க்கான தெளிவான பதிப்புதான் இது. ஆண்ட்ராயிட் மொபைலை உபயோகிப்பவர்களின் எண்னிக்கை உலகில் நாளுக்கு நாள் அதிகரித்துக்கொண்டே வரும் நிலையில் அதற்க்கான APPLICATIONகளின் எண்ணிக்கையும் அதிகரித்துகொண்டே இருக்கிறது ஆனால் பல முக்கியமான APPLICATIONகள் ROOT செய்யப்பட்ட மொபைல்களில் மட்டுமே இயங்கக்கூடிய தன்மையை பெற்றிக்கிறது உதாரணமக TITANIUM BACKUP, ROOT BROWSER,
FONT INSTALLER, SCREEN RECORDER இன்னும் பல அதனால்தான் மொபைலை ROOT செய்ய பலரும் விரும்புகிறார்கள் ஆனால்
அதை செய்வதினால் நன்மைகள் மற்றும்  கிடைக்கப்படுவதில்லை தீமைகளும் அதில்  இருக்கின்றது என்பதை தெழிவு படுத்ததான்
இந்த பதிப்பு இதை எவ்வளவு சுருக்கமாக சொல்ல முடியுமோ அவ்வளவு முயற்ச்சிக்கிறேன் உங்களின் பயனுக்காக  ROOT செய்வதினால் ஏற்படும்
தீமைகள் இதை தெறிந்துகொள்வதற்க்கு முன்பு 
ROOT என்றால் என்ன என்பதை தெரிந்துகொள்ளுங்கள்  பொதுவாக ANDROID SYSTEN FILEகள் அனைத்தும் மொபைல் தனது கட்டுப்பாட்டில் வைத்திருக்கும்
அதனால் SYSTEM FILEஐ உங்களால் COPY செய்யவோ அதில் எதாவது ஒரு FILEஐ PASTE  செய்யவோ இயலாது ஆனால் ROOT  செய்வதனால் SYSTEM FILEஐ  முழுமையாக உங்கள்  கட்டுப்பாட்டிற்க்கு SUPER USER  உதவியுடன் கொண்டுவர முடியும் இதனால் நீங்கள் ஒரு FONTஐ கூட  எளிமையாக இன்ஸ்டால் செய்திட  முடியும் EXAMBLE சிலரது பைல்கலில் தமிழ் FONT SUPPORT ஆவது இல்லை அவர்கள்  இதனை செய்வதனால் எளிமையாக  உங்களது மொபைலில் தமிழ் FONTஐ INSTALL செய்யலாம்
(FONT INSTALL செய்வதையெல்லாம் பின் வரும் பதிப்ப ்புகளில் பார்க்கலாம்)  ROOT செய்வது எப்படி MOBILEஐ ROOT  செய்வதற்க்கு உங்களிடம் கனினி இருப்பது அவசியம். 
பின்பு உங்களது மொபைலின் DATA
CABLEலும Root Pana neraya methods iruku
Aana nan 2 matum soldran..

1.)KINGO ROOT
2.) VRoot
-------Kingo Root method------
1.) Install this in ur computer---»»
www.kingoapp.com/android-root.htm 
2.) உங்களுடைய மொபைலில்  SETTINGS
பகுதிக்கு சென்று DEVELOPER OPTIONS > USB DEBUGGINGஐ  ENABLE செய்துகொள்ளுங்கள் 
3. உங்களது மொபைலிற்க்கான USB DRIVERஐ கனினியில்  
நிறுவிக்கொள்ளுங்கள் (ஏற்கனவே இருக்கும் பட்சத்தில் அவசியம் இல்லை )
4. இப்பொழுது KINGO ANDROID ROOTERஐ OPEN செய்து
5. கனினியுடன் உங்களது போனை DATA CABLE வழியாக இனையுங்கள் சிறிது நேரத்தில் KINGO ANDROID  ROOT உங்களது போன் MODEL  எண்ணை காண்பித்து ROOT செய்ய  அனுமதி கேட்கும் அனுமதி பெறப்பட்டதும் ROOT
செயல்பாடு 2 நிமிடங்கள் நடைபெரும் முடிவில் உங்களது போன் RESTART
ஆகும் அவ்வளவுதான்  இப்போது MENUவில் சென்று பாருங்கள் SUPER USER என்ற APPLICATION INSTALL செய்யப்பட்டிருக்கும் அதுதான் உங்களது போன் ROOT  செய்யப்பட்டிருப்பதற்க்கான  அடையாளம்.

---------- VRoot method------
1.) Install this -----> https://
www.dropbox.com/s/grfspvuwuif48yu/VRoot_1.6.0.3690_Setup.exe
2. Follow the instructions---->
http://forum.xda-developers.com/showthread.php?t=2479359
Elathaiyum Correct ah paningana
Kandipa Root Aaidum..
*************
¥ Shyam ¥
************
Share it..
அடுத்த பதிவில்
ஆண்ட்ராயிட் மொபைலை கணினி இல்லாமல் root செய்வது எப்படி ??

Popular Posts

Facebook

Blog Archive